
Xamarin tutorial iOS MapKit Part 1
Lately I have been working a great amount with iOS MapKit in Xamarin, to finish my first iOS app. Going through the work I found several good resources out there on how to do this, however; common for all of them is that they have been written for earlier versions of iOS than iOS 8. This has caused several issues to pop up during development, but through some googling I have been able to make it work. Because of this I decided to write a short tutorial describing how you could go on to use iOS MapKit for an app, created with Xamarin.
To keep this tutorial readable I have decided to split into several posts, where this is the first post. In this part I will walk you through inital setup and creation of the map. The next part will go into details in regards to annotations and the last post of this series I will go into some basic search functionality.
Note! The way I am using the tools available may or may not be the best, and I am encouraging you to provide feedback if you see any possible improvements.
A lot of tutorials just dive straight into code, however I want to show off how the final output is, so here you can see how the final app will look:
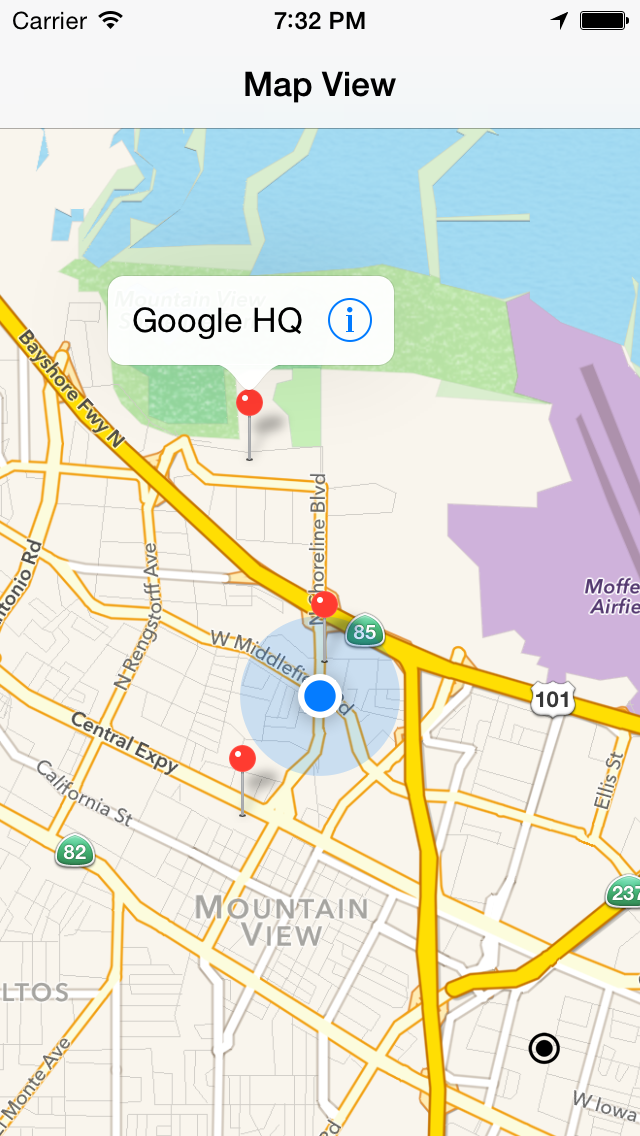
As you may see this is a simple app, with a map, your current location and some clickable annotations in the area around you.
Also I have made all the code available on GitHub.
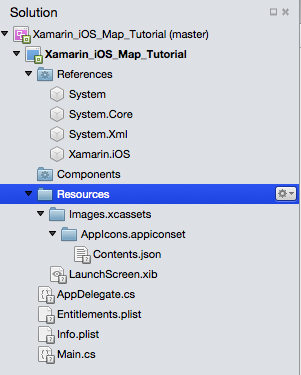
The first thing you want to do is to start a new Xamarin iOS project. For the purpose of this tutorial I have created an empty project, to start without any unnecessary files. The project structure should look something like this:
Open the Appdelegate.cs file. This is where the window is instantiated, when the app is ready, and where you set up the initial view and navigation controller. Appdelegate.cs is not to big, and from the example code it should be fairly easy to see what’s going on. Basically we create a window, a navigation controller and a view controller (I will come back to this one in a bit). The one thing I do want to point out is the following lines:
// Create a CLLocationManager
object _locationManager = new CLLocationManager ();
// Check the iOS version
if (UIDevice.CurrentDevice.CheckSystemVersion (8,0))
   _locationManager.RequestWhenInUseAuthorization ();
The “RequestWhenInUseAuthorization” is a new function in iOS 8.0 and above, which you need to execute if you want to use the phones location. It prompts the user for permission to use the location services of the phone. If you won’t be releasing the app for anything below iOS 8.0, then you don’t need the if check, however it is important to have it there if you intend to release the app for earlier versions of iOS. Another thing which goes along with this is in the info.plist file. With that file open you should go to the “Source” tab, and add a new line (I am now assuming you’re using Xamarin Studio). “NSLocationWhenInUseUsageDescription” should be the name of the line and it should be a string. In the value field you can enter a text which will show up in the prompt for permission to use the location services. With this in place we can move on to the view controller.
Let’s create a class called MapViewController. In the example code I used the DialogViewController template, but you can use other templates as well. If you look at the example project, you see that I have some properties declared at the start of the file. I need to point out one of them, this one:
protected string annotationIdentifier = "AnnotationIdentifier";
That string is needed for the customization of annotations, which I will get back to in the next part.
The constructor is quite small, it just calls a few methods to initialize the map, generate a list of locations for our annotations and adding the annotations. Lets dive into the initialization of the map. The code looks like this:
// Initialize map and user location
private void initializeMap()
{
   // Create a new MKMapView and add it to the view
   _mapView = new MKMapView (View.Bounds);
   _mapView.AutoresizingMask = UIViewAutoresizing.FlexibleDimensions;
   View.AddSubview (_mapView);
   // Show the users location
   _mapView.ShowsUserLocation = true;
   // Add an event handler for when the user moves and the location updates, if needed.
   // This will cause the map to jump to users location everytime it moves, even if the map is panned somewhere else
   /*_mapView.DidUpdateUserLocation += (sender, e) => {
      if(_mapView.UserLocation != null)
      {
         CLLocationCoordinate2D coords = _mapView.UserLocation.Coordinate;
         MKCoordinateSpan span = new MKCoordinateSpan(kmToLatitudeDegrees(5), kmToLongitudeDegrees(5, coords.Latitude));
         _mapView.Region = new MKCoordinateRegion(coords, span);
      }
   };*/
   // If the user denies location permission, or the devices GPS/location is unavailable
   if (!_mapView.UserLocationVisible)
   {
      CLLocationCoordinate2D coords = new CLLocationCoordinate2D (37.4057900, -122.0781260);
      // Set default coordinates to someplace close to Google HQ
      MKCoordinateSpan span = new MKCoordinateSpan(kmToLatitudeDegrees(5), kmToLongitudeDegrees(5, coords.Latitude));
      _mapView.Region = new MKCoordinateRegion (coords, span);
   }

   // Creates and add a button to center on current location
   var imageCurrentLocation = UIImage.FromBundle ("images/currentlocation.png");
   imageCurrentLocation.ImageWithRenderingMode (UIImageRenderingMode.Automatic);
   _btnCurrentLocation = new UIButton ()
   {
      TintColor = UIColor.Black
   };
   _btnCurrentLocation.SetImage (imageCurrentLocation, UIControlState.Normal);
   _btnCurrentLocation.Frame = new RectangleF ((float)View.Frame.Width - 60, (float)View.Frame.Height - 120, (float)imageCurrentLocation.Size.Width, (float)imageCurrentLocation.Size.Height);
   _btnCurrentLocation.TouchUpInside += (sender, e) => {
      _mapView.SetCenterCoordinate(_mapView.UserLocation.Location.Coordinate, true);
   };
   View.AddSubview (_btnCurrentLocation);
   // Add delegate for annotations to be able to customize the annotation
   _mapView.GetViewForAnnotation = GetViewForAnnotation;
} // end initializeMap
Lets see whats going on here. First we create the map object and place it in the view. In this example I set the size of the map to be the size of the view, so basically full screen. Next we say that we want to show the location of the user. Along with this we have some fallback code as well. In case the user denies the application to view the location, or the device doesn’t have GPS available, we need to set some coordinates as default. We also specify a region to show, which is calculated around the default coordinates.
We create a button for “my location” functionality, so that the user can center the map back to his position if he have moved the map somewhere else. In this example I use a custom button and add an image to the button. The button is them placed in the bottom right corner of the view. We will need to tie the button to an event handler, which will center the map to the location of the user. At the end we add a delegate for annotations, so that we’re able to create custom annotations.
That concludes this part of the tutorial. Hopefully you learnt something from this post, and I hope to see you return for the next part!